
Wednesday, June 10, 2015
Saturday, June 6, 2015
Accessorising
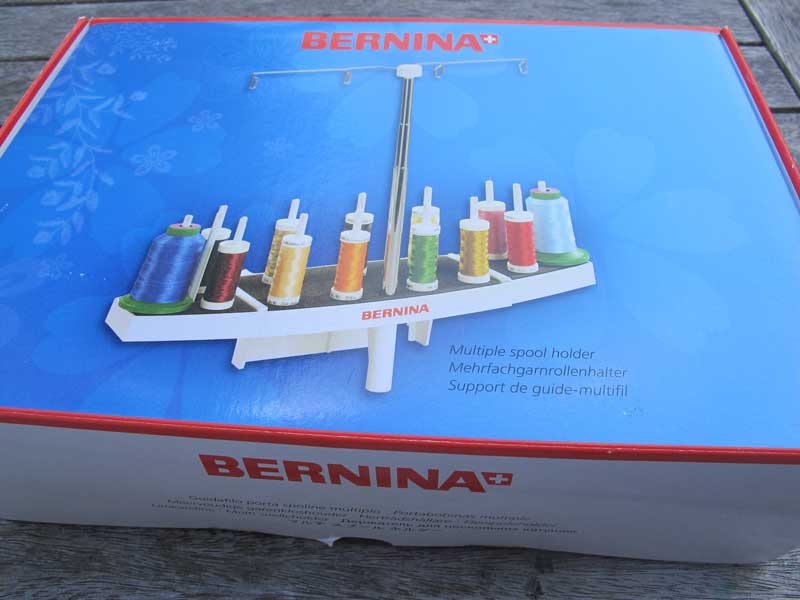
My favourite accessory for my Bernina (440) is the multi-thread holder. It is just the best for the bigger reels of thread and especially metallics and the silky threads such as the Madeira Polyneons.


 Before I had the holder I'd put the larger reels in a small container out the back of the machine so the thread would thread through ok. This mostly worked although there were times when the reel would bounce out of the container or the container (and thread) would end up on the floor.
While there are single thread holders available to have the ability to store several reels is great. If I'm working on a project with multiple thread colours I can have them all in the one place. What is a little annoying is needing to unthread when the bobbin needs to be wound.
The unit comes with one main holder and two smaller holders that can be attached to the back (see photo above) or sides (see box photo).
The best time to purchase one of these multiple thread holders is when the Bernina dealers have their accessory sale.
Wednesday, June 3, 2015

Friday, May 29, 2015
Knit One, Paint One, Repeat
 |
| Kint One, Paint One, Repeat |
In March I posted about my initial progress with the quilt (see here).
A couple of detail pictures ...
 |
| finished quilting |
 |
| back view |
It takes a bit of getting used to seeing the quilt when I enter the shop. A nice feeling and now to remember to enjoy seeing it as it is and not thinking about what I could have done differently or better.
Wednesday, May 27, 2015

Wednesday, May 20, 2015

Friday, May 15, 2015
More Ruler Work
I've continued playing with my Westalee rulers. See here and here for previous posts.
Note I've been using the Westalee ruler foot and not the freemotion foot that comes with my sewing machine.
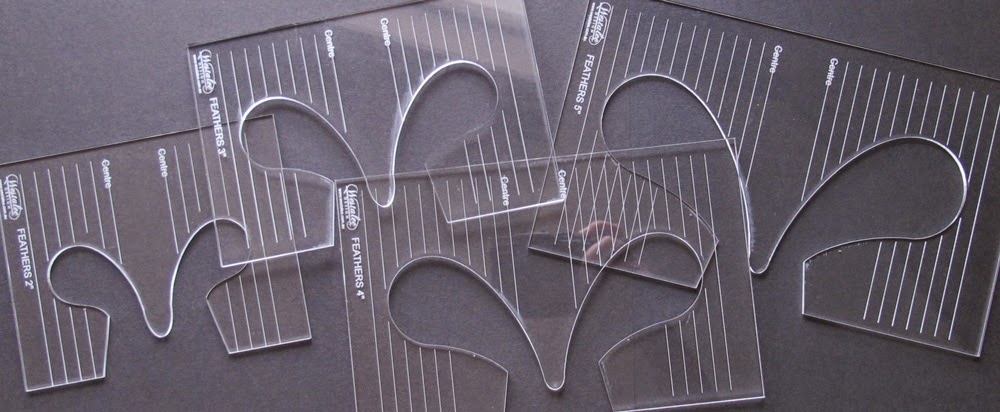
Trying the set of 4 feathers rulers ranging from 2" to 5".
 While you could just pick up these rulers and use them I found watching (and sometimes rewatching) the Westalee video sped up the learning process quite a bit.
No marking of the individual feathers is required however having a basting line or marking straight lines on either side of the feathers helps to keep the feathers uniform and straight.
Straight line of feathers using one sized ruler.

Wavy line with different sized feathers using a combination of rulers

Attempting curved cross-hatching using the Westalee straight and curved ruler.

I'm getting used to the edge of the ruler not being where the stitching line will be but 1/4" in from that. This catches me out when I'm getting to the end of a shape and need to line the ruler up - it is too easy to line the edge of the ruler up with the point, start sewing then realise you're not going to end in the right place!
Still working on getting the stitch length even and better start/stops ...
Note I've been using the Westalee ruler foot and not the freemotion foot that comes with my sewing machine.
Trying the set of 4 feathers rulers ranging from 2" to 5".
No marking of the individual feathers is required however having a basting line or marking straight lines on either side of the feathers helps to keep the feathers uniform and straight.
Straight line of feathers using one sized ruler.

Wavy line with different sized feathers using a combination of rulers

Attempting curved cross-hatching using the Westalee straight and curved ruler.

I'm getting used to the edge of the ruler not being where the stitching line will be but 1/4" in from that. This catches me out when I'm getting to the end of a shape and need to line the ruler up - it is too easy to line the edge of the ruler up with the point, start sewing then realise you're not going to end in the right place!
Still working on getting the stitch length even and better start/stops ...
Wednesday, May 13, 2015

Wednesday, May 6, 2015

Monday, May 4, 2015
Palm Beach
During our recent holiday to Australia we spent a couple of hours at Palm Beach, north Sydney.
Palm Beach is one of the locations where the Australian TV programme 'Home and Away' is filmed. Nothing happening the day we were there.


Walked up to Barrenjoey lighthouse to enjoy the 360 degree views.
We had tea at a nearby beach and then drove back into Sydney in torrential rain!
Palm Beach is one of the locations where the Australian TV programme 'Home and Away' is filmed. Nothing happening the day we were there.
Walked up to Barrenjoey lighthouse to enjoy the 360 degree views.
 |
| Barrenjoey Lighthouse |
 |
| Barrenjoey Head |
 |
| view towards Sydney |
 |
| a local fishing |
 |
| sunset at Palm Beach |
We had tea at a nearby beach and then drove back into Sydney in torrential rain!
Subscribe to:
Posts (Atom)