Pages

Showing posts with label bernina. Show all posts

Sunday, September 13, 2015

Green Orange Peel

A few days ago I posted here about starting a new quilt and the issues with cutting the applique shapes.  

The applique shapes have all been ironed on.  I didn't have enought fabric to cut enough shapes to cover the whole quilt mostly because of the number of abandoned shapes.  

I quite like the final pattern.


Once the shapes were ironed I was about to start appliquing by machine each piece.  Then thought how was I going to quilt it?


The answer - applique and quilt all at once.  So the top was basted and stitched with blanket stitch.  

To eliminate the stops/restarts, I started at a point blanket, stitched to the next point, changed to straight stitch, stitched to the next point, changed to blanket stitch, and repeated.


My Bernina has a feature that allows easy switching between two stitches without having to reset the stitch settings each time.  I increased the width and length of the blanket stitch from the default setting. I also used the walking foot.

For the squares with no shapes, the quilting was straight line and repeated the petal shapes. 

Now it just needs a bit of a trim and the binding sewn on.

Tuesday, September 8, 2015

Know when to stop or not

A few days ago I decided to work on a quick and easy project - a neonate quilt.  I'd seen a picture of a pieced quilt using an orange peel/petal design.   


My version was to piece the background and then applique the petal shapes on top.  


Piecing the 3" squares went well, I was happy with the applique shape I'd designed using the Silhouette software.  


 Next step - quick and easy to cut the pieces out on the Silhouette Cameo ...


 ...  a little while later I had nicely cut and fused shapes that only needed the paper removed before ironing to the top.   


In the hours between there were a few mishaps.

first problem - my original Silhouette mat had lost much of its stick as I discovered after carefully adhereing (or so I thought) the fused fabric (minus the backing paper).  


While the Silhouette did a brilliant job of munging most of the shapes, I did manage to retrieve a small number of shapes to use.

Now it would have been sensible to watch the cutting and stop it sooner!  


next problem - when I ordered the Silhouette I also received 2 cutting mats (not Silhouette brand) that can be used with any brand of cutting machine.  The cover sheet for the Silhouette mat is shiny on one side and matt on the other with both sides sort of plasticised so they easily peel off the sticky mat.  What I learnt with the other mat is that one side of its cover sheet is paper - as I peeled it away from the mat it managed to flip back onto the sticky mat and did not peel off! 

Perhaps this was a sign to stop, but no, I continued and used the second cutting mat.  Carefully putting on the fused fabric.  Now new mats are super sticky and the fusible pretty much became one with the sticky surface.  


I managed to retrieve a few fused shapes.  Mostly the fusible stayed with the mat and not the fabric.


At this point I almost gave up, instead decided a bit of research might be helpful - like watching youtube videos on cleaning mats and working with fusibles.

 
The recommended method of using painters tape to remove stray items from the mat and to restore the 'stickyness' works well with the Silhouette mat.  Just didn't work with the paper and fusible infused cutting mats.  


So they got a wash with warm soapy water and a high-tech scraper - an old credit card.  
After this I was off.


Successful cutting of a 12" x 12" piece of fused fabric.


Cutting smaller pieces of fabric is easy - the grid in the Silhouette software matches the grid on the mat making it obvious which shapes to remove or deselect in the software.  

From the videos I'd learnt to keep the fusible backing paper on and have the fabric sticking to the mat.  Also to select the thicker fabric (canvas) cutting option.  


What this meant was that the shapes lift out perfectly and they didn't roll the paper did.  It did mean a bit of time pulling off the paper from each shape.  


While not relevant to this project the same applies to stabilising fabric with freezer paper,  when cutting put the fabric against the sticky mat with the freezer paper on top. 

Presumably using freezer paper and the fusible paper will blunt the 'fabric' blades faster - not a big problem when you get a way better cut.

Meanwhile the quilt is progressing ...

Saturday, June 6, 2015

Accessorising

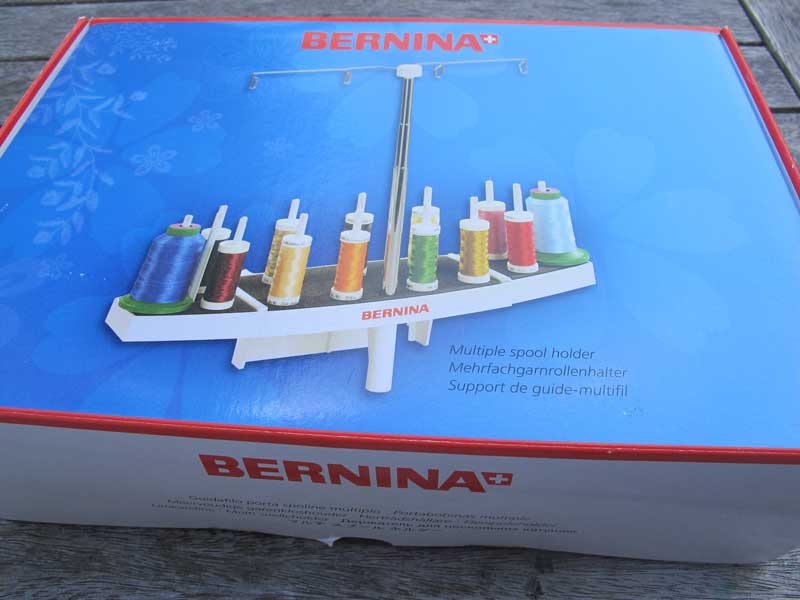
My favourite accessory for my Bernina (440) is the multi-thread holder.  It is just the best for the bigger reels of thread and especially metallics and the silky threads such as the Madeira Polyneons


Before I had the holder I'd put the larger reels in a small container out the back of the machine so the thread would thread through ok.  This mostly worked although there were times when the reel would bounce out of the container or the container (and thread) would end up on the floor.

While there are single thread holders available to have the ability to store several reels is great.  If I'm working on a project with multiple thread colours I can have them all in the one place.  What is a little annoying is needing to unthread when the bobbin needs to be wound. 


The unit comes with one main holder and two smaller holders that can be attached to the back (see photo above) or sides (see box photo).

The best time to purchase one of these multiple thread holders is when the Bernina dealers have their accessory sale.   

Friday, May 15, 2015

More Ruler Work

I've continued playing with my Westalee rulers.  See here and here for previous posts.  

Note I've been using the Westalee ruler foot and not the freemotion foot that comes with my sewing machine.

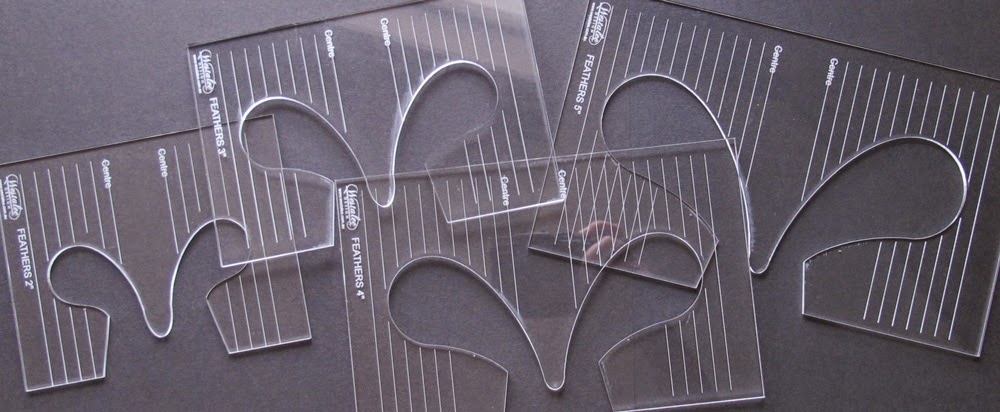
Trying the set of 4 feathers rulers ranging from 2" to 5".

While you could just pick up these rulers and use them I found watching (and sometimes rewatching) the Westalee video sped up the learning process quite a bit.  


No marking of the individual feathers is required however having a basting line or marking straight lines on either side of the feathers helps to keep the feathers uniform and straight.

Straight line of feathers using one sized ruler.


Wavy line with different sized feathers using a combination of rulers


Attempting curved cross-hatching using the Westalee straight and curved ruler.

 
I'm getting used to the edge of the ruler not being where the stitching line will be but 1/4" in from that.  This catches me out when I'm getting to the end of a shape and need to line the ruler up - it is too easy to line the edge of the ruler up with the point, start sewing then realise you're not going to end in the right place! 

Still working on getting the stitch length even and better start/stops ...

Friday, March 20, 2015

Wannabe Longarmer

Recently I've been reading blogs about using rulers, that longarm quilters use, for freemotion quilting on a domestic sewing machine.  

It was clear that using the freemotion (darning) foot and an ordinary quilting ruler wasn't going to work.  I'd read enough that I wasn't even tempted to try and see if I could get it to work.

The blog I keep going back to is Amy's Freemotion Quilting Adventures in one post (here) she talked about using a combination of Janome feet on a Bernina.  I thought there must be an easier way.  

And there is .. an Australian company Westalee Design has designed a foot and rulers for domestic sewing machines.  After watching their video, I ordered the foot and ruler and a week later it arrived. 

Westalee foot and ruler


For the foot to work on my Bernina 440 a Bernina 'low shank adaptor foot' is required, which I already have. Following their great instructions, attached the foot and was off ...
 
... had a bit of a play ...


Then onto a mini neonates quilt.  While I could have achieved the same result with a walking foot, it was a great trial.  

using Aurifil 50wt thread


I found it easier to hold the ruler when it was on the left handside of the foot.   On the righthand side it tended to move abit - probably as I'm left handed. Would also help it I stuck on the non-slip strip that came with the ruler!

So now more practice and experimentation, although this will need to wait until I've finished my knitted quilt.