My playing with fabric twine progressed to an actual project. I had a metre or so of a darkish batik that had been bought as a backing fabric, yet it had never found the right quilt.
It was ripped it into ~1inch wide strips along with three lighter batiks. An easy project to pick up and quickly a reasonable amount of cord has been produced.
The idea was to create placemats as a Christmas present, after working out how much fabric and effort was required to make 8-10 placements - the intended recipient has a large table, I settled on placemats that could be used in the centre of the table.
 As I wanted an oval shape I started with two longer strips before starting to go round and round.
The peg held the pieces together until the stitching had started and prevented the twine unravelling.
As I wanted an oval shape I started with two longer strips before starting to go round and round.
The peg held the pieces together until the stitching had started and prevented the twine unravelling.
Going round and round ...
... almost done.
It would have been easier to have the mat on the left of the needle!
Three completed placemats that are mostly the same size and shape.
Either side can be used, I had black in the bobbin and a variegated polyester on the top.
Recently a friend demonstrated how to make fabric twine. I watched but didn't pay too much attention ... a couple of days later happened (!) to come across instructions (see here, includes a video) and had a play.
A few pieces of abandoned hand dyed fabrics ripped into roughly one inch strips ...
... and rather too quickly had a large ball of twine.
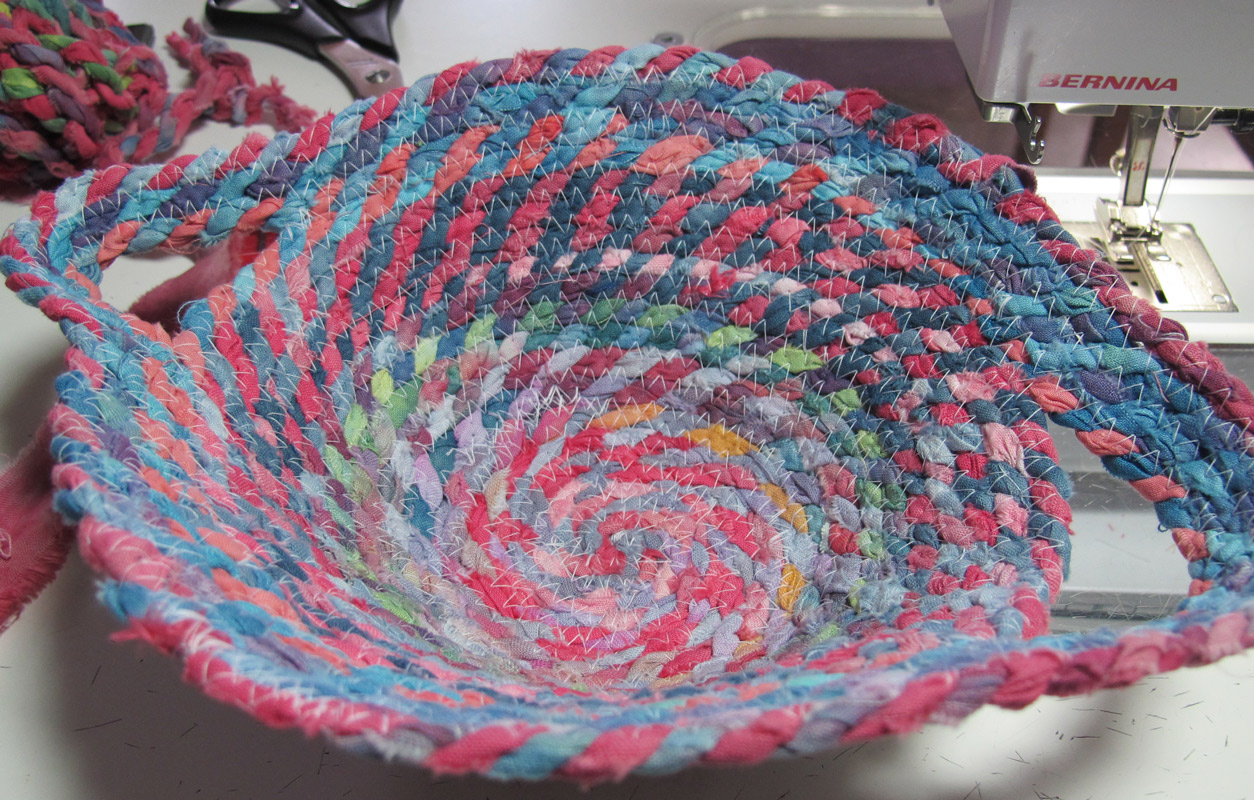
Days later had whipped up a bowl.
How the bowl was created ...
Using a wide and long zigzag sewed the strips together in a circular shape. I used a large jeans needle (100/16) that sewed easily through all the layers.
To start the bowl shape, tilted the piece as I sewed.
To add a handle, held the twine away from the edge for a couple of centimetres, stitched and then rejoined on the other side and continued stitching.
The trick is to evenly place the handle on the other side.
 To shape the base, use a similar sized dish and iron the base and the edge. The ironing flattens the twine and seems to hold the shape quite well.
Now on to the next project, this time with a more controlled colour scheme.
To shape the base, use a similar sized dish and iron the base and the edge. The ironing flattens the twine and seems to hold the shape quite well.
Now on to the next project, this time with a more controlled colour scheme.
 As I wanted an oval shape I started with two longer strips before starting to go round and round.